How To Build a SaaS Prototype in 10 Easy Steps
There are many compelling reasons to build a SaaS product and the successful foundation is laid by a robust and resilient prototype.
As a result, building a prototype becomes a key step in developing any Software as a Service (SaaS) product. It provides a clear framework for testing ideas and getting a working model before jumping into full-scale SaaS software development. Further, a well-designed prototype lets a SaaS company pinpoint user needs, refine features, and reduce wasted effort in later stages.
Prototyping, however, isn’t something to be taken lightly. A hasty approach can result in missing out on important insights that could make or break the final product. Each step needs to be followed systematically to avoid blind spots and keep the development on the right track, especially when you are a startup or a small business that is looking for guidance.
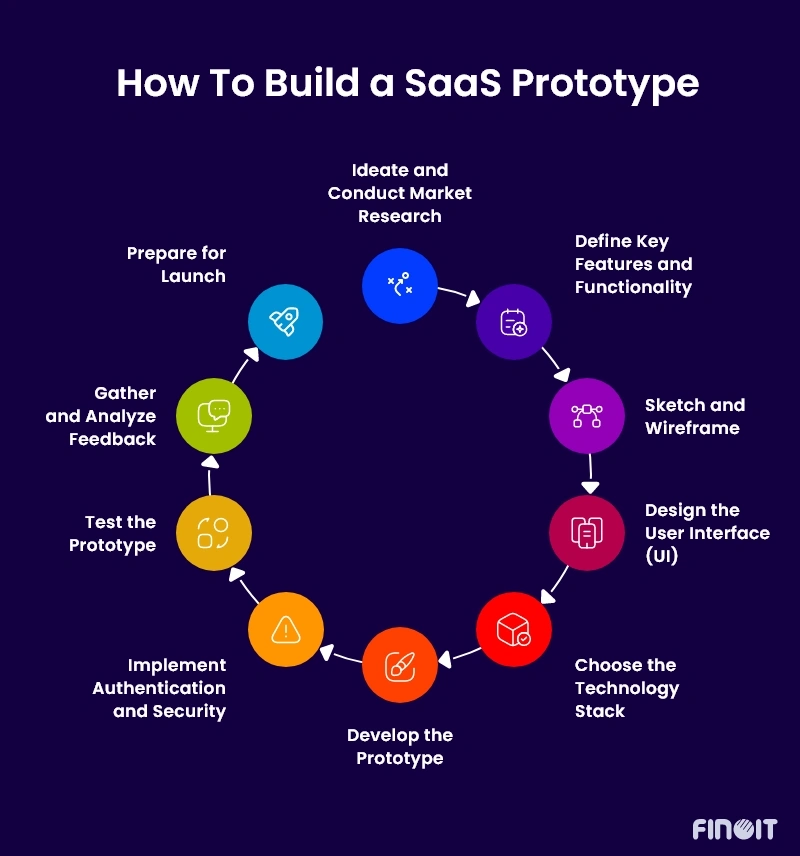
As a result, we break down the entire process into the following ten easy steps:
- Ideate and Conduct Market Research
- Define Key Features and Functionality
- Sketch and Wireframe
- Design the User Interface (UI)
- Choose the Technology Stack
- Develop the Prototype
- Implement Authentication and Security
- Test the Prototype
- Gather and Analyze Feedback
- Prepare for Launch
With these steps, you will be able to build a SaaS product that resonates with users and meets market demands. Let’s dive in!
Step 1: Ideate and Conduct Market Research
Every successful SaaS product starts with a well-defined problem statement. It’s essential to understand the pain points your potential users face. Consider conducting informal interviews with people in your target audience to gather insights. Ask them about their daily challenges, inefficiencies they encounter, and any current solutions they use. Digging into these conversations reveals valuable information that can shape your product’s direction.
Once you’ve identified the problem, articulate it clearly. A compelling problem statement should outline the specifics of the issue and highlight the impact it has on users. By doing so, you lay the groundwork for developing a SaaS solution that truly addresses their needs.
After defining the problem, it’s time to conduct thorough market research. This involves gathering data on your target audience, analyzing competitors, and understanding market demand. Utilize tools like Google Trends, SEMrush, or Ahrefs to gain insights into trending topics and search volumes relevant to your idea.
Analyze your competitors’ offerings. What features do they provide? What are their strengths and weaknesses? This analysis helps you identify gaps in the market that your product can fill. Aim to find unique selling propositions (USPs) that set your product apart.
Understanding your audience’s demographics, preferences, and behavior is key to shaping your marketing strategy and product features. Creating buyer personas can help you visualize your target customers, ensuring your product aligns with their needs and expectations.
Before diving into product development, validate your idea. Use surveys, interviews, and market analysis to gather feedback on your proposed solution. Next, conduct A/B testing with landing pages. Present two versions of a landing page highlighting different features or benefits of your product.
Monitor engagement metrics to see which resonates more with potential users. Additionally, determining whether to create a vertical SaaS product (focused on a specific industry) or a horizontal platform (serving a broad audience) is crucial at this stage. Vertical solutions allow for deeper customization, while horizontal products attract a more extensive user base.
Step 2: Define Key Features and Functionality
Identifying the core features of your SaaS product is a critical step in the prototyping process. Start by listing all the features you envision, then refine the list to the essentials. Focus on functionalities that address the primary problem you’ve identified.
Consider features that are vital for user satisfaction and retention. For instance, if you’re developing a project management tool, essential features may include task assignment, progress tracking, and team collaboration functionalities. Prioritize these features based on their impact on user experience and overall product value.
Creating user stories can significantly aid in defining how users will interact with your product. User stories are brief narratives that describe the user’s goals, challenges, and actions in the context of your product. For example, “As a project manager, I want to assign tasks to team members so that I can streamline our workflow.”
These stories help maintain a user-centric approach throughout development, ensuring that each feature aligns with the needs and expectations of your target audience. Gather feedback on these stories from potential users to refine them further.
Once you have your core features and user stories, it’s time to prioritize them. Techniques like MoSCoW (Must have, Should have, Could have, and Won’t have) are incredibly useful here. Focus on “Must have” features that are essential for the initial product launch.
By categorizing features in this manner, you can concentrate your efforts on delivering an MVP (Minimum Viable Product) that meets basic user needs while planning for future enhancements.
Step 3: Sketch and Wireframe
Before diving into detailed wireframes, create initial sketches of your SaaS product’s interface. These sketches should focus on the layout, key components, and overall flow of the application.
Utilize pen and paper or digital tools like Procreate to get your ideas on screen. These rough sketches don’t have to be perfect; the goal is to visualize the structure and start thinking about how users will navigate through your product.
Once you have your sketches, transition to more polished wireframes. Use Balsamiq, Sketch, or Figma as they are excellent tools for creating detailed wireframes that outline the layout and interactions of your SaaS product.
Since wireframes serve as blueprints for your application and help you visualize the user interface and how various elements will come together, collaborate with your development team during this phase to align everyone on the design.
Visual representations play an important role in this process. Map out user flow diagrams to illustrate the journey users will take through your SaaS app. These diagrams outline the steps users will follow to achieve their goals and highlight key interactions and decision points along the way.
Understanding user flow allows you to identify potential bottlenecks or friction points in the user experience (UX). The step is important for ensuring a seamless and intuitive interface that guides users toward their objectives.
Step 4: Design the User Interface (UI)
Following best practices in UI design is essential for creating a visually appealing and user-friendly product. Focus on clarity, simplicity, and intuitiveness. Users should feel comfortable navigating your product without feeling overwhelmed by complex elements.
Consider employing design principles such as the Gestalt principles, which emphasize how users perceive visual elements. For example, grouping related items together can help users understand relationships between different functionalities.
Choose design software that aligns with your team’s needs. Adobe XD, Figma, and Sketch offer powerful features for creating visually stunning designs and facilitating collaboration.
These tools allow for prototyping and interaction design, and enable you to simulate the user experience. Engaging stakeholders in this phase provides valuable feedback before you start the SaaS software development process.
Equally important is to develop a style guide so as to establish consistency across your product. The style guide should outline design elements such as colors, typography, button styles, and iconography.
Having a cohesive visual identity strengthens brand recognition and contributes to a better user experience. A style guide acts as a reference point for designers and developers alike, and aligns all the elements with your product vision.
Step 5: Choose the Technology Stack
Selecting the right frontend framework can significantly impact your product’s performance and user experience. React, Angular, and Vue.js are popular options, and each of them offer unique advantages.
React, for example, is known for its flexibility and efficiency, while Angular provides a robust structure for building complex applications. In general, choose a framework that best suits your product requirements and you must have professionals with expertise in those areas.
Like frontend, the choice of backend technology is equally important. Frameworks such as Node.js, Django, or Ruby on Rails are proven tools for streamlining backend development. Each framework has its strengths, so consider factors such as scalability, performance, and community support when making your selection.
Node.js, with its non-blocking architecture, is particularly well-suited for real-time applications. On the other hand, Django offers a powerful ORM and a strong emphasis on security, making it ideal for data-intensive applications.
Alongside frontend and backend technologies, you must also decide on a database solution as it is a key aspect of your technology stack. Options like MySQL, PostgreSQL, and MongoDB cater to different data storage needs.
MySQL and PostgreSQL are relational databases that work well for structured data, while MongoDB is a NoSQL database ideal for handling unstructured data. Your choice should depend on the nature of your application and expected data complexity.
Finally, choosing a cloud provider is vital for hosting your application. AWS, Azure, and Google Cloud are among the leading providers. Go into the details of the offerings of these cloud services and understand how they support your application’s hosting needs.
While making your selection and building a SaaS tech stack, consider factors such as applicability, ability to scale the SaaS product, and ease of use. Aim to set up a scalable infrastructure right from the beginning so as to grow your application without major roadblocks. Most importantly, first evaluate if you possess the necessary skills or not. If not, then it is always better to seek assistance from third-party services. However, in that case you must choose the right SaaS development vendor.
Step 6: Develop the Prototype
To ensure a smooth development process, start by setting up version control with Git. This allows the team to collaborate effectively, track changes, and maintain a clean codebase. Integrating CI/CD tools into this workflow ensures that every commit triggers automated builds and tests, catching issues early and preventing integration problems.
Containerization with Docker creates consistent environments across development, testing, and production. CI/CD pipelines work seamlessly with Docker, ensuring the application behaves the same across different stages.
For the frontend, focus on implementing the user interface based on design specifications, with attention to responsiveness and cross-browser compatibility. Regular testing of the application with real users helps refine the UI. With CI/CD, each frontend change can be automatically deployed to a staging environment, enabling quicker user feedback and continuous testing.
On the backend, develop services and API endpoints to handle data processing and application logic. A modular codebase ensures scalability as your app grows. CI/CD automates the deployment of backend changes, running tests to ensure they don’t break functionality or affect performance.
Finally, configure the database to handle data flow smoothly between the app and backend. Implement migration scripts to evolve the database schema alongside the application. CI/CD simplifies the management of these migrations, ensuring consistent database updates and preventing deployment errors.
Step 7: Implement Authentication and Security
When developing a SaaS product, ensuring user authentication and robust security measures should be baked into your application from the start. Set up a user authentication system, to allow users to sign up, log in, and manage their credentials easily. Integrate OAuth and social login options (e.g., Google or Facebook login) to reduce friction for users during the registration process.
Don’t miss out on encrypting sensitive information such as passwords and personal details both in transit and at rest. Use HTTPS for secure communication and SSL/TLS certificates to maintain data integrity. Proper database security, including encryption at the database level and secure data storage, is important to safeguarding user information. It is not just enough to implement protocols but you must regularly update your encryption standards and security protocols to keep up with evolving threats.
Moreover, compliance with relevant industry standards and legal frameworks is non-negotiable. For example, if you’re catering to European customers, GDPR compliance is essential to avoid hefty fines. Similarly, industries like healthcare may require HIPAA compliance to manage sensitive health-related data. Audit your product against these regulations to successfully meet necessary legal standards while building trust with your users.
Step 8: Test the Prototype
Thoroughly test the prototype to validate that it functions as intended. Various types of testing should be employed for this purpose, including unit testing, integration testing, and user acceptance testing (UAT). Let’s see what these tests offer to the process.
- Unit Testing:
Focuses on verifying the correctness of individual components. With CI/CD pipelines, every code change triggers automated unit tests, ensuring that new updates don’t break existing functionality. Frameworks like Jest or Mocha can be integrated into the pipeline for both frontend and backend testing.
- Integration Testing:
Tests the interaction between components to ensure seamless functionality. CI/CD automates integration testing by running tests every time new code is integrated into the system, catching issues early when components fail to work together as expected.
- User Acceptance Testing (UAT):
Involves real users testing the prototype to validate its usability and functionality. With CI/CD, you can quickly deploy the latest version of the application to a staging environment for user testing, enabling rapid feedback loops. This helps refine the user experience based on real-world interactions.
Apart from these tests, implement automated testing to streamline the testing process. Automated tests help catch regressions and maintain the ongoing functionality as new features are added. Use Selenium or Cypress to automate frontend testing, and Postman to streamline API testing.
Additionally, involve early users and stakeholders in testing to gather valuable feedback and establish feedback loops to collect insights on user experience, functionality, and performance. Use this feedback to iterate on your prototype, and make enhancements where needed.
Step 9: Gather and Analyze Feedback
Continuing the process, engaging initial testers allows you to identify usability issues and areas that need improvement. Early feedback can be collected through surveys, focus groups, or beta testing sessions. Invite users to provide detailed responses regarding the product’s functionality, ease of use, and any pain points they experience. A quick way to gather this data is through integrated feedback tools, prompting users for input as they interact with your SaaS app.
Beyond direct user input, use analytics tools like Google Analytics, Mixpanel, or Hotjar to monitor how users interact with your SaaS platform. These tools offer insights into user behavior, including time spent on different features, conversion rates, and user flow bottlenecks. Heatmaps show which sections of your site users engage with most, and help you make informed decisions on where to refine or optimize the user experience.
Data-driven decisions go a long way in SaaS development. If certain features aren’t being used as expected, analyze why that’s the case. It could be a design flaw, a usability issue, or simply that the feature doesn’t align with user needs.
Step 10: Prepare for Launch
Before launching your SaaS product, conduct beta testing with a select group of users, identify all remaining issues and gather final feedback before your public launch.
Select users who closely resemble your target audience, ensuring you receive relevant feedback. Offer incentives for participation, such as extended trial periods or exclusive access to features.
As you prepare for launch, develop a marketing strategy to promote your SaaS product. Identify your unique selling points (USPs) and craft compelling messaging that resonates with your target audience.
Utilize various channels to promote your product, including social media, email marketing, and content marketing. Building a pre-launch email list also helps you generate buzz and gather interested users before the official launch.
To Wrap Up: Start Building a SaaS Prototype Today
Building a SaaS prototype using simple, structured steps gives you a clear path from concept to a tangible model. It’s about keeping things lean, focusing on core functionality, and prioritizing adaptability.
While the prototype isn’t the final product, it sets a firm foundation for scaling based on real user feedback and business goals.
When you start with a well-executed prototype, you not only save time and resources down the line but also gain a strategic advantage in refining your SaaS offering for long-term success.
If you are keen on building a successful SaaS product, seeking guidance from a SaaS development expert becomes paramount. With professional expertise you expedite the success journey.